When it comes to creating 3D World of Warcraft artwork, the center of a piece is almost always a character. Everyone has their own method of building character models, and people often ask me what method is for mass-producing them. So, that's the motivation for this guide. I'll be sparing no details or secrets as I deep-dive into my character model workflow.
Some notes before we get started:
- This guide is written explicitly for Blender and may not be useful for other software.
- This guide is aimed at advanced users and assumes some familiarity with used software.
- You will need the most up-to-date versions of wow.export (0.1.26) and Blender (2.91.2).
- For some sections of this guide, you will need NodeJS installed and available.
Introduction: This is the way.
The easy answer to why I create characters the way is efficiency, but let me explain that answer in a little more detail first. You've probably already used a character skin before, pre-baked from some tool such as WMV (WoW Model Viewer).

This is made by taking all of the many individual components of character customization and equipped assets and then baking them into a single texture (the same way the game engine does) which you can then apply to your character model. This is fine, but I have some problems with this:
- What if I want to re-colour the characters hair? I could use a photo editor to re-colour the beard/scalp, or overlay the textures in a different colour.. but that's time wasted.
- What if I want to swap out a tabard or shirt later down the road? Commissioners do this often. I could re-export the character for a new skin.. but that's time wasted.
- What if I want to have seven versions of the character each with minor differences? I could export seven versions of the character to get seven skins.. but that's time wasted (and also inefficient for rendering).
- What if I want to apply compositing effects to the skin but not effect the outfit? I could mask things in a photo editor.. but that's time wasted.
By now, you're probably starting to see a trend. Pre-baked skins are great if it's right the first time and you don't want any changes, but that's almost never the case for me.

For my workflow, I instead use pre-built shaders (like the one above) to map the individual texture components to create a realtime character skin. Want to use different night elf markings? I simply swap the texture; it's that easy. We'll go into more depth on this later.
Now that's great for character skins, what what about geosets? In-case you're not familiar with the term, geosets are the invididual components that make up a model. For example, each different hairstyle is an individual geoset.

When exporting character models from tools such as WMV, the geosets tend to get configured automatically and come attached as part of your character model. That's cool, but let me explain why I think that's bad:
- If I want to change a hairstyle later on, I have to load up the character in WMV again and re-export the entire model just to get the hairstyle.. that's time wasted.
- WMV has a tendency to enable/disable the wrong geosets, meaning manual configuration of them which will instantly reset if you change any item.. that's a lot of time wasted.
- FBX is used to export character models (for armature/weights) which means the geosets are melded together as one big mesh, this means time wasted when swapping them about.
- What if I want to use animations between races? Due to how WMV names bones, this isn't possible. But it absolutely should be, because the bone structures are not that different.
- What if I want to use a hairstyle from one race on another? It's possible, but it's very time consuming.
In summary, lots of time wasted. To this end, I have pre-made character rigs ready to use at any time. If I'm building a Night Elf Female, I simply open that rig and start customizing.

I prefer this method over any other character building method I have seen, and here's why:
- Each rig contains every geoset available to the character and can be individually toggled on/off at any point.
- All geosets are pre-weighted to the armature, meaning no weight work is needed when swapping geosets around.
- All geosets have correct textures pre-assigned with shaders, including auxiliary UV mapping and shaders for advanced assets (DK glow, new eyes, etc).
- I've named every geoset based on their in-game names (when applicable), making finding hairstyles and such as easy as looking for the name (HairPixie, HairShaggy, etc).
- Geosets are individual meshes, allowing easy transformation and mesh editing without having to separate them from the parent mesh.
- Geosets can be drag-dropped between models, allowing instant swapping of hairstyles or other assets between races.
- Bones are uniformly named, meaning animation swapping between races (when the skeleton structure allows).
- Models exported from tools often come with loose geometry and double faces. I've gone through and removed all of these from the models in advance.
There are more advantages, but I think I've made my love for this workflow pretty clear at this point. Combine these rigs with the skin shaders that I mentioned above and it takes almost no time at all to get a character model fully working.
Chapter 2: Is it possible to learn this power?
So there you have it. All you have to do is create a rig for every single character race/gender combination, sort/name all the geosets, apply weighting, create shaders for every material, restructure the bones...
... Or if that sounds like far too much work, you can have mine! You'll find a link below to an online archive with a rig I've manually created for all 44 race/gender combinations. The entire collection is 500MB~ so I've split each into a separate ZIP file.
http://www.kruithne.net/home/files/patreon/rigs/
These rigs are the culmination of months of work on my part, so I'd ask that you don't share them. It only costs $3 to access this guide, and that support allows me to continue making things like this for you awesome people.
Some notes on the rigs:
- Each one comes with only a single set of textures which I use as a default to demonstrate all available customization options. Keep reading the guide!
- While Demon Hunter assets are not part of the base character models, I have included/weighted/labelled them anyway because it made sense and saved time.
- I've included most of the mechangnome customization assets, but alternative limb options are missing due to a technical issue.
- Dark Iron Dwarves are missing the glow overlay from their hair. I didn't realize until way too late, and I haven't had the time to fix it.
Once you have at least one of the rigs in your posession, open it up in Blender and you should see something similar to the following.

I use the same pre-configured layout for all the rigs for ease-of-use. Before continuing, spend some time familiarizing yourself with how the files are setup.
Chapter 3: Let's Cook.
In this chapter I'm going to go over the shaders (primarily the skin shaders) in depth and explain how they work and how you 're meant to use them. The observant of you may have noticed that floating next to character is a creepy skin map.

This plane has the characters skin texture mapped to it so you can easily see the complete skin map in realtime as you make changes to the shader. There are two reasons I have this here: firstly, it's often easier to spot mistakes when the skin is flat rather than on the model. Secondly, it's used for skin upscaling, which we'll cover in a later chapter.
A character skin is made by taking a base texture (this defines the skin colour for the body) and then compositing smaller texture components over the top of it at pre-defined positions or slots.

In each shader there are 10 mapping nodes, one for each of the slots shown above. This allows us to quickly take a texture and map it into a slot. To speed up building a character, textures for all available customization of the race are already available in the shader.
As an example, let's re-customize the blood elf female model. Start by going into wow.export and grabbing the textures we want to use. Don't worry if you're thinking this seems slow and tedious, we're starting simple before we jump into automation.
I grabbed the following files:
character/bloodelf/female/bloodelffemale_hd_skin_color_3500122.blp
character/bloodelf/female/bloodelffemale_hd_face_3500074.blp
character/bloodelf/female/scalpupperhair00_02_hd.blp
character/bloodelf/hair00_02_hd.blp
Once exported, they should look like this:

Back in our shader, we want to load each of these textures into the correct slots. Each of the image textures is labelled to help.

Since we're changing the hair colour, we're swapped out the scalp texture but we also need to change the hair colour itself. This is controlled by another material, which for this model is called BloodElfFemaleHair. You can get to it quickly by simply selecting any hair geoset.

With that done, take a look at the character model and you should notice the new textures are in-use and she's good to go with her new look. Swapping out the hair texture will also take affect for every hairstyle, so don't worry about changing the texture for each one!

Next up, let's apply some clothes. For this example I'm going to be using the items Simple Blouse, Simple Britches, Simple Gloves and Simple Shoes. We'll go over how to find textures for an item later, for now I've listed the textures used below.
item/texturecomponents/armlowertexture/cloth_a_06red_glove_al_u.blp
item/texturecomponents/armuppertexture/cloth_a_06red_sleeve_au_f.blp
item/texturecomponents/foottexture/cloth_a_05brown_boot_fo_u.blp
item/texturecomponents/handtexture/cloth_a_06red_glove_ha_u.blp
item/texturecomponents/leglowertexture/cloth_a_06red_boot_ll_u.blp
item/texturecomponents/leglowertexture/cloth_a_06red_pant_ll_f.blp
item/texturecomponents/leguppertexture/cloth_a_06red_pant_lu_f.blp
item/texturecomponents/torsolowertexture/cloth_a_06red_chest_tl_f.blp
item/texturecomponents/torsouppertexture/cloth_a_06red_chest_tu_f.blp
A little tip, if you enable "Paste Selection" in the settings for wow.export, you can copy the above list of textures and press CTRL + V on the textures tab to automatically select all 9 textures, and then export them all with one click.

This is where things start to look tricky until you get used to it. We need to take these textures and put them all in the shader.
Let's walk through this together. Start by creating two new Image Texture nodes in the skin shader. It's important that you set the UV extension to CLIP on the nodes. In the first one, load in cloth_a_06red_chest_tu_f and use the TorsoUpper mapping and in the second load in cloth_a_06red_chest_tl_f and use the TorsoLower mapping. Combine them both together in a Mix RGB node, and combine both the alpha channels together in a Math (Add) node.

The reason we're mixing these two textures together before we mix them with everything else is because they sit together as one, and mixing them together first prevents seams. Certain slots are often paired together this way: TorsoUpper + TorsoLower, ArmLower + ArmUpper, LegLower + LegUpper, LegLower + Foot, ArmLower + Hand.
Create another Mix RGB node and add it to the end of the long chain before the Diffuse BSDF node, using the value of the Math (Add) node we created as a factor for the mix.

Think of this chain of mixing nodes as layers. Things that need to appear at the top of the skin should be toward the end, such as tabards. Textures that need to be buried underneath should be near the start, such as shirts.
Let's repeat this process for the remaining textures. cloth_a_06red_pant_lu_f and cloth_a_06red_pant_ll_f are mixed together using the LegUpper and LegLower mappings respectively. Next cloth_a_06red_boot_ll_u and cloth_a_05brown_boot_fo_u are mixed together using the LegLower and Foot mapping respectively. The order is important here, as the latter two make the boots, and the former two make the pants, and the boots need to be placed above the pants.

Additionally, we've mixed cloth_a_06red_glove_al_u and cloth_a_06red_glove_ha_u together using the ArmLower and Hands mapping, and then cloth_a_06red_sleeve_au_f is mixed in by itself using the ArmUpper mapping since there is no accompying lower arm texture.
How am I deciding which mapping to use for which texture? Honestly, the answer to that is not very helpful; I'm just doing it manually by memory. I've found the textures are easily identifiable by their dimensions, appearance and name, that automating it wouldn't actually save time.
Take leather_pvprogue_b_02_chest_tu_f.blp for example, the "tu" stands for torso upper, which helps identify the slot intended for it.

Assuming you did everything correctly, you should now see the items we picked out on the character model. You'll notice a couple of issues though. The gloves and boots are flat and her boots are shaped like toes.
Sorting this is easy, simply hide the geosets 30_BootsA, 26_BracersA and 62_Feet, and then show the geosets 31_BootsB, 27_BracersB and 63_Shoes.

Chapter 4: Texture Acquisition
After the last chapter you might have some doubts about the efficiency of this workflow. Manually exporting individual textures from wow.export is definitely not efficient, especially when we can't search by item name.
This is where we make use of a few more things: the Wowhead Dressing Room, wow.tools and some NodeJS scripting.
Start out by using the Wowhead Dressing Room to outfit a character with the appearance and items that we want to use. This tool has many advantages such as item searching, appearance controls, importing from the armory and even importing from in-game add-ons such as Narcissus.

Once you have the character customized as you desire, copy the URL from the address bar, - which has automatically updated as you changed things - and put it aside for now.
Next, we're going to do some scripting, for which we'll need NodeJS, so make sure you have it installed. Make a new folder and open a command line (Shift + Right-Click in the folder -> Open Command Prompt / PowerShell window here).
The script itself can be found on my GitHub by clicking here. Save that to a file called download.js in the new folder you've created. Alternatively, you can save yourself a few clicks and download it by running the following command in your terminal.
Invoke-Webrequest https://gist.githubusercontent.com/Kruithne/e5300696f09ab7cd44127ed02566876d/raw/download.js -OutFile download.js
Before we run the script, let me explain what it does. If it's your first time running the script, it will install some dependencies into the working directory. The script then starts by loading the Wowhead dressing room using a URL we give it. A simple web request wouldn't work, so instead it leverages puppeteer to create a browser instance. Requests to the instance are then monitored for both models and textures.
Using this output, we have a list of fileDataIDs. To make this information more useful, the script then queries the wow.tools API in order to get a full name for the texture, which is output to the terminal.
Lastly, to save time having to export any of the textures, as the browser instance loads them, they are saved to a new folder with a name given as part of the syntax. Let's give it a try! The syntax is "node download.js <characterName> <URL>".

If everything went as planned, you should see output similar to above listing both the models and textures used. Additionally, you should now have a folder filled with textures.

You may have noticed that while we're outputting item component models (such as shoulder pads) from the script, there are no model files in the output. This is because the format the dressing room uses for models is no use to it. This doesn't matter to us, we'll cover rigging of item components in the next chapter.
Chapter 5: Item Components
Following on from the previous chapter, we can now take a character from the dressing room and bring it into Blender fairly easily. The only thing we're missing now is item components.

Item components are external models used for a characters armour, such as shoulder pads and belt buckles. If you followed chapter 4, the output from the script will contain the paths of models we need. From my example, the models listed as follows.
item/objectcomponents/shoulder/rshoulder_leather_pvprogue_b_02.m2
item/objectcomponents/shoulder/lshoulder_leather_pvprogue_b_02.m2
Exporting these from wow.export is as simple as copying the paths in and clicking the export button. Once exported, import them into Blender. Looking to be as efficient as possible? Check out my last post on one-click imports from wow.export, it helps a lot here.
After the assets are imported, you'll find a lot of them laying at the characters feet. Simply position them on the character (still in T-pose). Some components, such as shoulder pads, may need scaling.

Once you've positioned the components correctly, add an Armature modifier to the components with the Object set to the characters armature. Additionally, parent the components to the same armature. This can be done quickly by dragging the components into the armature in the Outliner, holding Shift + Alt to parent while maintaining transformations.
Now for each of the components, we need to weight them to the armature. A basic understanding of weight painting in Blender is required here.
Select the armature and the component, enter Weight Paint mode, select the relevent bone and apply weight as necessary.

A quick way to figure out the best bone to weight something to is to select the bone in weight paint mode and wiggle it by pressing R (then ESC to cancel). Shoulder pads should be mounted to the shoulder bone (Bones 21 and 22 for a blood elf), as an example.
The process of weighting components will require a lot of trial and error at first, but once you are familiar with the bone structures, it will take mere minutes to attach a full outfit of components to a character.
Chapter 6: Upscaling
For those of you who use texture upscaling (such as my automated method I outlined in this guide here), you're going to run into an issue when it comes upscaling the new skin material.
If you upscaled the individual textures used by the skin shader - which is what my upscaling automation would do by default - you end up with a broken looking skin with very visible seams where the texture components no longer line up with each other.
To overcome this, we need to bake the skin. I know, I started this guide by saying baking was bad, but the process is painless and doesn't remove any of the advantages.
You may have noticed that in each of the character rigs I've created, there's a plane floating beside the character called BakePlane which has the skin material assigned. This is what we'll use for baking. It is important there are no other materials on the plane.

Start by adding a new Image Texture node in the skin shader and assign a new 1024x512 image to it, as shown above.
You MUST make sure that the only thing selected in the node editor is this node you created, and that the BakePlane object is the only thing you have selected in the 3D viewport.
Note: In the screenshot, the Device being set to CPU is highlighted. Previously, this was required, but this is now out-dated and you can render using GPU as a device too.
Set the Bake Type to Diffuse. Uncheck contributions from Direct and Indirect, then hit the Bake button in the Render Properties tab.

This might take a moment, depending on the complexity of the shader. Once done, select the Image Texture node and under the Item tab, save the baked result somewhere you scan upscale it. Additionally, replace the input of the Diffuse BSDF node in the shader with the output of the baked image node.

Now you can upscale that image wherever you saved it and reload it. If you need to make any changes to the skin, simply reattach the last Mix RGB node back to the Diffuse BSDF, make your changes, then go through the baking steps again.
But wait, this seems like a lot of clicking. You're right. Naturally, I've automated this entire process with some Python for Blender.

Code: https://gist.github.com/Kruithne/98086315eb1b928c79dea472c56cb6ae
I highly recommend installing this script as a Python macro; check out my recent guide on how to do that!
As a note, you'll need to make sure to change the hard-coded directory on line 38, which specifies where the baked image is saved for external upscaling.
Chapter 7: Interchanging Assets
One of the best advantages of this workflow is that every geoset is a separate component. This allows us to interchange them between races. For races of a similiar build, such as gnomes vs mechagnomes, assets such as hairstyles can be swapped painlessly. For more obscure swaps, you'll need to do some resizing and potentially some weight painting.
Let's start with something simple! We're going to take some mechagnome assets and place them onto a gnome character. Start by opening the mechagnome character rig.
Find the geosets you want to transfer in the outliner and select them. The first step is to unlink the armature from these geosets. This is done so that when we copy the geosets, Blender doesn't copy the armature object too.

Additionally, unlink the desired geosets from their parent. With them all selected, this can be done quickly by pressing Alt + P.

Now they're detached, simply copy them (CTRL + C), open up another rig (in this example, a gnome female) and paste them in (CTRL + V).
The geosets should line up perfectly with the model, but they're not yet attached. Simply add an Armature modifier to each of the geosets and set the Object to the characters armature. Additionally, parent the geosets to the new armature (drag into with Shift + Alt in the outliner).

That's it. You don't need to do any weight painting since the bone structures between these races match 1:1, so the geosets will now weight perfectly onto the new armature without any work.
Chapter 8: Animations
As mentioned in my summary of this workflow, one of the advantages of my rigs is that the bone structures now have a normalized naming convention. This means that, structure allowing, animations can be shared between races.
Combinations such as Blood Elves and Void Elves, which have identical skeletons, will share seamlessly. Your mileage will definitely vary for non-identical combinations.
At the time of writing this, wow.export does not currently support animation exporting. Fear not, for I've hosted a repository containing all 14,000+ animation files in FBX format for you!
You can preview the animations on the Wowhead Dressing Room, and then find the relative file on the repository. Additionally, the _packed directory contains bulk ZIP files if you want to download them all.
Go ahead and import the animation FBX into Blender. Before we can copy over the animation, we need to convert the bone structure. Doing this manually would waste hours, so naturally we turn to Python once more.

Code: https://gist.github.com/Kruithne/883ddb775104450431e56bf79fa0de71
Just as before, this snippet works great as a Python macro (see my guide here).
Select the imported FBX armature and run the above code, and now the animation on it can be freely applied to any of my character rigs.

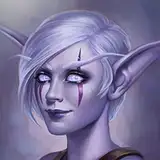
Chapter 9: Taste the Rainbow
It's been a few chapters since we touched the skin shader, but it plays a big part in the workflow and the advantages that come with it. In this short chapter, we're going to explore just one of the many things we can do with it; re-colouring.
With pre-baked skins, if we wanted to re-colour a part of a characters attire, such as a tabard, we'd have to paint over it in a photo editor or apply modified texture components over the top. This isn't ideal. With the skin shader, re-colouring individual components is as simple as adding in a Mix RGB node in the shader.

If we wanted to use custom hair colours, we can now apply the RGB mix to beards, scalp and eyebrow textures all in unison. By making use of shader groups, we can even link the nodes together between shaders for shared colouring.
Modifications applied in the shader like this will be included if you bake the skin for upscaling, as detailed in Chapter 6.
Chapter 10: Summary
If you made it this far, then good job. The contents of this guide is the culmative effort of months of workflow improvements condensed into (hopefully) digestable chunks.
I haven't covered every single optimization and macro that I use in my workflow, as some of it is linked to hardware (I use a Hasu USB convertor for a macro keyboard), some of it comes down to excessive key-bindings in Blender, and some AutoHotKey macros for inputs; but I've covered the bulk of it in the hopes that you can at least take something for your own workflows.
If you have any questions or problems, you have access to the #champion-lounge channel on my Discord, which I make my priority to support Patrons there.
Thank you for reading, and good luck!