Hello everyone!
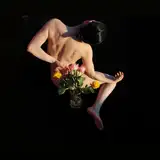
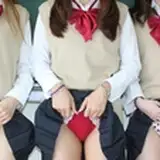
More than a tutorial, today I wanted to address a concern from one of our patrons, who was unclear about how to approach hip drawing from some references shared on our Discord. These references featured two females seated in a particular way, making it difficult to discern how the hips were structured. So in today’s post, I want to simply share my take on this pose from a technical perspective.
About Hips
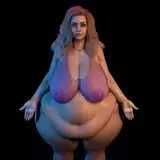
So far here on Patreon, I’ve spoken about the torso and anatomy in relation to hips in very general terms. I suppose it’s because I’ve seen plenty of references on how to draw them, so I haven’t found it useful to do more of the same. But, in a few words, drawing hips this way, in simple geometric shapes can be broken down into three different rectangular forms. The first one, at the top, is a classic rectangle. The second, in the middle, is not quite as rectangular, more like the shape of "briefs underwear." The last rectangle is at the bottom, representing the legs.
To refine these shapes, I recommend turning the areas where the hip and leg bones stand out into curves. Then, after refining the overall silhouette, adjust the line that suggests the separation between the leg and hip.

This simplification will help you understand some basic shapes for the next step, which is the seated pose.
For this example, I’ll choose a lateral view, as I believe this was the problem the artist was facing.
In step one, you’ll see our very basic shape of the hip composed of the rectangles I previously mentioned.
Since the anatomy of the hips doesn’t allow them to bend the same way a straight rectangle would, you’ll notice how I subtly turn some of the lines representing the hip into curves. In the drawing, I split the geometric shape of the leg so you can see how the "briefs" shape is supposed to change—basically moving the bottom side of the shape towards the front, as the leg is supposed to cover this side.
Step three consists of reconnecting that leg shape to fully show how the straight lines change into curves, especially where the glutes are.
In this step, I simply erased all the guide lines and made the leg shape more rounded.

The references shared had hips with a bit more perspective, because the gesture allows the hips to be positioned differently than in the step-by-step process I just shared. But what will mostly change is how the legs are positioned, since the bone structure of the hips moves as a whole. I hope this makes sense.

I know this might be a rough approach to these issues, but understand that I often draw in a very messy way, not thinking too much about structural execution but more from an intuitive perspective. My goal with these tips is to provide a straightforward guide to achieving anatomical drawings, at least similar to the ones I do. If you find these types of articles useful, please let me know in the comments.
Here are some other articles on the subject of poses and gestures.
Tips for Studying Full-Body References - Anatomy!
Anatomy in Motion: Tips to Avoid Stiff Torso and Arm Drawings
Dynamic Anatomy (Head, Torso and Hands) - Shape Building Tips
.
This Friday, I'll share insights on today's illustration, 'Serve,' where I'll discuss my approach to the idea of musketeers and cutlery. Along with that, I'll include the process video and file. Don't forget to upgrade to access this content! Thank you for your support.
Ramon Nuñez
2024-09-29 07:46:50 +0000 UTCMasked Artist
2024-09-28 10:52:37 +0000 UTCRamon Nuñez
2024-09-26 07:10:39 +0000 UTCCarlos Salamanca Ramos
2024-09-25 13:47:24 +0000 UTC