Good morning folks. Another week, another progress update.
Over the last week of editing, things have inexorably moved forward. Slowly but surely. One composition after another.
You can see my progress right here -
https://docs.google.com/spreadsheets/d/19tOipWj8X3P8nNhxRY9jWX5xB8hi-gK450FbOfdButo/edit?usp=sharing
I think the best sort of update would be for me to walk you through the animation work. To show what specifically I'm doing on a daily basis.
Let's talk about scene B14 - a simple and straightforward 3.33 second clip - the 14th scene in the second sequence. A couple of hours of work at the most.

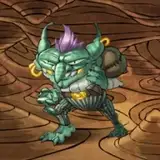
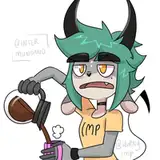
In this scene, Cyanide is telling us what happened the weekend before. A short clip before a flashback where he claims they killed a goblin on a bridge.
For most of the characters there, I can simply copy and paste their idling animations. Lump, Lashonda, Nep and Eandor aren't actually speaking. So it's a fairly simple affair to paste in some static characters with blinking eyes, etc.
Cutting those corners for the sake of efficiency.

But Cyanide's character Lashonda is speaking. Therefore he get the animation focus.
The first thing I'd do is copy in the Lashonda master file. With all the limbs properly parented and ready to go.

Each character has a small handful of these for side, front, back, etc. And whilst there are exceptions, necessitating little custom animations, most of the animation has the characters talking to each other. Making these default poses useful.
From there, I can custom name this particular Lashonda as B14. Anything I do to it will remain here. It's also going to be useful later if I need to outsource any mouth animation work. It'll be as simple as sending the file and asking the volunteer to "animate B14 Lashonda Mouth".
For these will only be one instance of it in the entire project.

From there, I simply import the cut segment of the audio into After Effects. And now I have something to time the animation to - https://www.dropbox.com/scl/fi/x57nkak62next395nppkr/pass1.mp4?rlkey=qx9dwr1kuhfcb7uinfjo9u7u3&st=rip3mmu4&dl=0
I like to start with the Body, Neck, Head and Legs. Giving keyframes for some very broad motions. "Easy ease" is your friend here, as we don't move like robots. Stopping and starting instantly. The easy ease smooths that motion - https://www.dropbox.com/scl/fi/qund5ktrzuvgg7mtqppsc/pass2.mp4?rlkey=zseo3kmvfguoo3072zg6q6pkn&st=7j3kxv4o&dl=0
Also, at the top of the preview window, After Effects will let you rapidly snap back to the comps higher in the chain. Meaning you can rapidly review your work. Very handy.

Next, character accessories. For each character has bits of equipment that they had during the original game. And depending on which direction they're going to face, the right piece of gear needs to be facing the viewer - https://www.dropbox.com/scl/fi/jmnzo14m5cszpugfzm1ps/pass3.mp4?rlkey=ovtnnz4w2kaknwe80tignevj0&st=kvgm6fe6&dl=0
Cyanide has a dagger on his right belt, a quiver of arrows on his left. Lump must always have his sword in his right hand, etc.
Then come the brows and the eyes. As a little editing trick, all of the different expressions have been placed in the same composition. And I've made a little slider to cycle between them. That turns minutes of faff into seconds.

Expressions become part of animation pass 4 - https://www.dropbox.com/scl/fi/jm4kfci2rlv95mpy9m2h9/pass4.mp4?rlkey=ncbauo0u22oym75tkq6m8k4to&st=19qg73vr&dl=0
Next up, speaking phonemes. Same trick with the slider. Making this an easy thing to outsource as I go.

Animation pass 5 with the phonemes - https://www.dropbox.com/scl/fi/42wqet31x347prbgl98yz/pass5.mp4?rlkey=1jbk5e87u5jhuk14q8x3i7nk7&st=64of43oo&dl=0
Then it's the eyes. It's a simple but crucial part of the process, making sure the eyes are either maintaining eyeline with the person speaking. Or are moving around during the dialogue to make them seem alive. Animation pass 6 - https://www.dropbox.com/scl/fi/iczi4klxj8e0kwni32aib/pass6.mp4?rlkey=mh8dlukf6imug3zjn8xpbbarg&st=sadgjyek&dl=0
Note that there's also a series of "blink" layers that the artists have given me. I can sprinkle these around where needed to make the character feel more alive.

Animation pass 7 is for limbs. For once the rest of the body is animated, it's fairly easy to judge what the limbs should be doing - https://www.dropbox.com/scl/fi/dv3r1vcyzu667qv8nynlk/pass7.mp4?rlkey=ecbgbyia90xapmvv7yofv79p6&st=ccgwn6jt&dl=0
Animation pass 8 is for things that should be flapping around to give a sense of momentum. Hair needs to be flicking, pauldrons need to be clattering - https://www.dropbox.com/scl/fi/ybi389ks210t7j3ipr8xd/pass8.mp4?rlkey=yp3xxvmk1ubun1xh5eby64ujc&st=zdoi8tlm&dl=0
Combine all this together and the previous static character is now moving around on your timeline - https://www.dropbox.com/scl/fi/w9dpapbo3omtyzxil30it/pass9.mp4?rlkey=i5r6j9vk2f4v7nzjbkhu9fgli&st=0m1g2ix4&dl=0
At which point I deploy my final trick - my beloved Null Objects. The invisible squares that so faithfully move the text around for me. For the characters compositions are parented to them. And then the nulls are scaled to consistent values. Shrinking or growing the asset to try and make sure the characters are a consistent size, scene to scene. - https://www.dropbox.com/scl/fi/idxa4g05fy31q45q21i5a/pass10.mp4?rlkey=0od27987zu2s74j822jfz09ef&st=fhaj9lcl&dl=0
And there you go. Whilst the scene isn't complete yet, the most important part of it is the person speaking. And the rest of the scene can be polished around them.
All of that for 3.33 seconds out of 25 minutes. Yikes!
1 scene down, 151 others to go.
Follow up post about that coming :)