RYUKO WIP and walkthrough
Added 2019-05-26 22:29:26 +0000 UTCAs requested, I'd like to give a more in-depth WIP post to this month's pinup. Sorry in advance if it's still a bit vague, I've never been very good at teaching or explaining things. Feel free to comment if you have any questions about specific things. The entire piece was done in Clip Studio Paint.

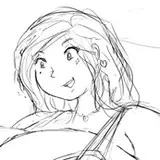
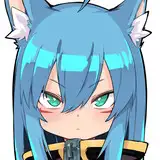
• First step is the rough sketch! Quick and loose. The idea here is to get the shapes down and make sure it all fits on the canvas. Not pictured here is a lot of resizing, lasso tool, and rotating. I like sketching in blue and light red. The face has been cleaned up a little bit because I wanted to show this sketch early to announce the poll result.
• Next comes the cleanup sketch. I use a dark gray pencil brush to start getting a cleaner drawing and focus on fixing up the anatomy. This is actually a lot cleaner than it needs to be.
• Then I start adding the clothing in another color. Also the scissor blade. Not pictured here is about a hundred redraws of the blade because it's a super weird shape that's hard to draw. Thankfully I own the Figma figure for Ryuko so I was able to use it as reference to finally get the shape correct.

• Next step is the line art! I used Clip Studio's G-pen brush. I've adjusted it a lot on my own to get something that's close to how my traditional ink lines look when scanned. It's too many small adjustments to go over here, so you'll have to play with the options menu on your own to find what feels good. The underwear is drawn on it's own layer to make the alternate version easier to color.
• Next I select all the areas outside the lines, then invert that selection and fill in a solid color. In this case white.
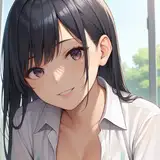
• Then I start selecting smaller areas and drawing in the different colors.I make sure to make the color edges aliased (not blurry) so then can be selected and changed with ease. The color choices were easy in this case because I've drawn Ryuko before. I'm reusing the same color palette. I've also added in a little background detail because it came to mind.

• I duplicate the Color layer, then I begin to select each color separately and paint in the shading. In this case I used a more paint-y kind of brush. It's one of the Frenden Clip Studio brushes. Again I've customized and adjusted it a lot to my own preference. Often I use the lasso tool to select and fill in shading, but not this time. It's up to whatever you feel like doing.
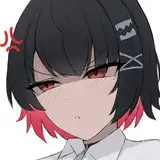
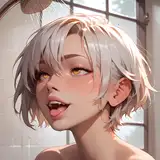
• Highlights are added in. Shiny hair! Shiny skin! I think I often overdo it, so I've been trying to add highlights more sparingly.
• • Note the softer highlights and shading that I've begun to add in to emphasize the form and soften the skin. You can sometimes achieve this with small gradients as well. Also note at this step I've begun to add some reflective light by lightly going over some areas of shadow with a light blue brush.

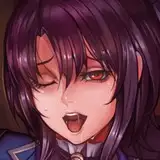
• Next I start coloring the lines where I feel it looks good. I've also added in some more details to the eyes. An easy way to color over your lines is the lock the transparency of the layer and just paint over it. I usually leave the lines around the edge dark or black.
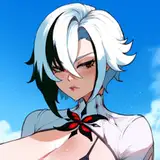
• Then it's a few more steps. I finished up the background and cleaned up some small details. Note the transparent white lines. I add an outline behind the base color layer to make the character stand out against the background, then I paint some more transparent white lines in a few select areas where I think it will help the depth. Here you can see some by the hair, shoulders, and scissor blade. The background was a gradient and then some extra painting using the same brush as the rest of the image.

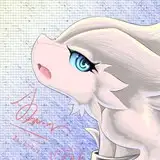
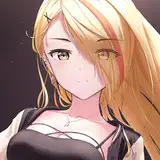
• Now it's time for the final touches. First I added a red border. Not sure if this would be cropped in print, but that's not important this time. I thought some texture would look nice, so I made a noise layer over the whole image, lowered the opacity to about 17%, then changed the mode layer to "Soft Light". ("overlay" also works, try out different modes to see what you like.)
And finally a GIF to end things! Here you can see where small adjustments were made.

Comments
Thanks dude.
Matthew Czuprynski
2019-05-28 07:23:11 +0000 UTCI don't think it has anything to do with printing. Just a visual effect.
STUPIDDEAD SKULLHEAD
2019-05-28 06:11:31 +0000 UTCCool, thanks. Now out of curiosity. I know most artists commonly add noise to their pieces which may turn into prints. But why is that done? Is it to help with the printing process, is it for visual effect?
Matthew Czuprynski
2019-05-28 06:07:52 +0000 UTCI know of two ways. One is in the Filter menu: https://i.imgur.com/wu1W5Fg.png The other is to make a selection and use the halftone pattern option in the drop down menu: https://i.imgur.com/BSg30Cj.png
STUPIDDEAD SKULLHEAD
2019-05-28 03:48:23 +0000 UTCHow do you produce the noise layer? Is there a noise filter I have not noticed in Clip Studio Paint?
Matthew Czuprynski
2019-05-28 03:06:56 +0000 UTCThings like this a really awesome, I'm a (really amateur) pin up artist myself and seeing a breakdown of how you get stuff done is extremely helpful :3
Dan Jetstar
2019-05-28 01:27:09 +0000 UTC• A little of both. The wand tool helps too. • There are so many brushes in that pack that it's overwhelming. For this piece I used the "Layout" pencil, and the "Basic Bob" paint brush. I like the "Drybrush Darrel" too.
STUPIDDEAD SKULLHEAD
2019-05-27 22:50:29 +0000 UTCI guess I have a few questions though if that's okay. First, for when you filled in the flats, you mentioned the colors being filled and aliased. Do you just do the filling manually using a brush or do you use some sort of lasso/fill technique for the flats? And second, out of curiosity, you mentioned using Frenden brushes for parts of this piece. I bought his packs recently too, and I was wondering if you had any particular brushes that you're really fond of and would recommend. Thanks again.
Cheese Al Fonte
2019-05-27 17:16:34 +0000 UTCSounds like a good idea! Maybe I'll do some tutorials for traditional stuff around inktober.
STUPIDDEAD SKULLHEAD
2019-05-27 01:13:24 +0000 UTCThis is super helpful and everything I wanted. Thank you so much! Would love to see you do more stuff like this with pin-ups and art pieces you create on here in the future. As well, I noticed you mentioning scanning your ink drawings into the computer, and I think some advice on how to achieve the best quality possible when transitioning your ink drawings from physical to digital would be incredibly helpful. Keep up the amazing work!
Cheese Al Fonte
2019-05-27 00:24:28 +0000 UTC