Brush used: "23 brushes" 1st brush in the set http://johaan-n.deviantart.com/art/23-Brushes-for-Photoshop-117421513
Brush settings:
Brush: opacity 100% with transfer -minimum 80-90%
Mixer brush tool: Wet 80% Load 75% Mix 90% Flow 100%
Step 1- I first start by coloring the character in their main darkest color.
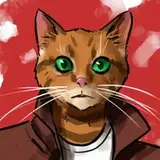
Step 2- I work from dark to light, adding the darkest tones first and gradually work up to the lighter markings. My characters usually have 2-3 shades to their color, for example, there are three shades of Ronja´s cream and 3 shades of her red.
Step 3- Once I´m finished with painting the markings, I use the "Mixer brush tool" to gently mix the colors together to a gradient shade.
Step 4- Final details added as well as shadows from the leaves above. To do this I paint with a leaf brush on a seperate layer set to multiply. I take down the opacity slightly and blur the shadows. I often use the eraser with a grass brush to erase parts of the paws to let the grass show through, but this time I did that on a layer above the characters to keep the complete body of Ronja untouched, in case I would need it later for her ref or other things.
Viktor
2017-09-02 11:51:32 +0000 UTC