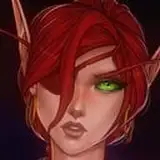
This week I’d like to continue the art lesson-oriented journal entries and write a little bit about how to draw a human head, and by “draw” I don’t mean a technical lesson on how to actually -draw- a head. My aim in writing these types of journal posts is to provide insight another artist can incorporate into his or her own style without saying “this is the Right way to do it” or “you should do it how I do it”, I want people to discover their own voice and hone their own unique approach to making art. Or, if they don’t fancy themselves artists I like to show how my own unique artistic mind works to solve my visual problems. And one of those problems I’ve figured out ways to solve is the issue of how to draw the human head in various abstract perspectives and open up an artist of any style to exploring more varied and emotive body expressions. I’d like to show you not how to build a wheel but instead the various ways you can make it spin, so let’s get down to business.
The human head is our primary means of emotive expression, followed in a close second by our hands. One of my old college professors would push us to learn the heads and hands because not only were they the most important and expressive parts of our subjects, they were also the hardest to draw (hands in particular deserve a lesson all their own). Our facial expressiveness largely comes from the muscles of our face pulling our features this way and that, but if we’re going to make sense of where to stick those features we have to understand the foundation on which everything is built: the skull. Everything is rooted to the bones below it, so if we’re going to know where we should draw something we should know where the bones beneath it are pointing, what angle the viewer sees it from and, optionally, where our light source is hitting that bone at that angle from in relation to the viewer.
Here’s a skull I drew (A I). The way I like to think of a skull is an egg resting on its side with a mask hanging off the front end, so the apex of the top scalp curve is towards the rear of the egg. The egg is very important since that’s where a character’s brain is. If we don’t consider the egg and start by just drawing a face with a rest-of-the-head tacked onto the back we’re going to get some weird-looking heads when our characters aren’t looking right at the camera. So egg first, paper-plate mask on the front, you can fill in the rest as you go, that’s how I start all my faces because the egg-first approach means I can put the facial mask anywhere I want on it and lay the foundation for the perspective I want to hit, and avoid a very common pitfall in drawing human heads.
Bad habits are really easy to pick up and even harder to break, we all have them, every single one of us. One of my old bad habits was drawing my faces first before drawing my heads. What I learned to do as a bad habit was memorize the rote shapes of how I built my faces- the line of the cheek, the line of the nose, the lines that make the eyes and mouth, the lines of the ears and the lines of the head. I learned lines and how to create the symbols that represented a head in ¾ perspective instead of learning shape, form, depth and volume, and it was a hard habit to break and move away from, and it’s honestly one I see a lot of artists succumb to. They’re not drawing heads, they’re arranging lines in symbols in a way that represents the idea of the head without consideration of what’s going on spatially with that head, and I used to do it all the time myself. The ways I learned it are from three very specific angles, the Profile, the ¾ Perspective and the Front-On shot (A II, III and IV, respectively). These three perspectives are an all-purpose toolkit for filling in the bulk of what you might possibly want to be drawing and people can get by using these three exact specific angles without anyone noticing, but it’s limiting in terms of the expressions you can achieve with them. You could rotate any one of these three angles to achieve up- and down-angled variations using the exact same rote lines from before. These three angles are a pitfall which is hard to break out of, but they’re also an example of my egg-and-plate method mentioned earlier. Very simple!
Before we start exploring the rotation of the head I’d like to take a moment to talk about the primary means of that head turning this way or that, the neck. The neck is a stack of about five or six bones that supports and rotates the head on the top two bones, the Atlas (topmost) and Axis (second-topmost) bones. The two muscles that control the position of the head are the muscles with my most-favorite of all muscle names, the sternocleidomastoids (stern-oh-clide-oh-mast-oid). These are muscles that connect from your Sternum and Clavicle to the part of your skull just behind the hinge of your jaw which enables you to Masticate (chew) your food. There’s one on either side of our neck- they’re the thin one that shows up when we get mad- and they pull our heads this way or that, the Atlas and Axis facilitating motion in either direction. This is how we turn our heads! So it’s also a big deal in contextualizing our expressions.
The neck is an important consideration when drawing our heads. Not only is it influenced by the curvature of the spine- and thus needs to fit within the position of our ribcage- it can stretch and squish to a degree itself. You don’t want to just stick all your facial expressions on a neutral vertical neck (B I), you want to incorporate the angle of the neck into your bodily emotion. If you’re curious or puzzled you might tilt your head forward or lean it to the side (B II). If you’re fearful or defensive you tend to pull it back (B III) or sink it into your shoulders if you’re feeling guilty or scolded. The neck isn’t just a vertical, incidental support pillar existing somewhere below a face, it’s like a mounted arm supporting your eggy skull, holding it this way or that, so it’s important to remember to account for this in your block-in phase before you commit to too much detail.
Speaking of detail, I think it’s time to explore how to set up our abstract head angles. With the structure of our head in mind and the position of that head on the neck, with respect to the ribcage, it isn’t hard to figure out where the features on that head should go. While my egg-and-plate method works great in most circumstances, there’s some angles where it doesn’t quite cook the biscuits, and in these cases I use the advanced method. If we think of the head in terms of planes we can easily represent it as a cube, with a top, front and side face visible at any one time. The cube gives us a sense of where one plane “ends” and another “begins”, even in something round like our skull. I don’t like to use a literal cube when I block it in, though. I’ll add more plates to my egg, one for the top and sometimes, depending on the angle, one for the side as well. This gives it a look less like a cube and more like one of those old dice with the rounded corners- it makes it easier to translate into egg skull when you leave out the pointy parts. In my first example I’d like to draw Alice looking down at her camera, so I start with my basic block-in (C I). I draw the egg of her skull and since I want her looking down I put the plate-mask circle for her face low on her head. To help reinforce the angle I’ll add a second circle at the top to represent the top of the scalp so I don’t accidentally render this area as forehead and lose the angle I want to hit. And just to complete the angle, since she’s looking to the side I’ll add that third circle and fill out the rounded cube look. I’ll block in her ribs and her camera. I drew a little demo cube to show the angle I was looking for. The next thing I’ll do is flesh out my face (C II); I find when I use my plate mask method sometimes the bottom line of the egg-skull circle will coincide with the center of the face, which is great because that’s generally where the eyes live (in the direct middle between the top of your skull and the bottom of your chin). So a mid-line for my eyes, a vertical line to represent the middle of the face but also the angle of the head and a block-in of my eyes. I’ll go through the process of blocking in and building my figure until eventually I arrive at a sketch with the angle I want (C III), in this case I sunk Alice’s neck a bit in her shoulders since she’s looking down at her camera’s viewscreen while also pulling it up to her face with her hands. The circle for the top of her head is still there and in my tonework I’ll usually put the hair highlight here- a radial hair highlight really goes a long way towards defining the roundness of the head. The part in her hair is visible and serves to reinforce the notion that she’s tilting her head down, thus we see as much of the top of her head as we do!
That’s all there is to it! Instead of thinking in terms of lines and symbols I think in terms of shape and form, define where I want my features to go, set up little markers for them, put my eyes on the right line and build from there. You can do this to achieve any angle you’d like; Lizzie demonstrates another example in a different angle (C IV), one where she’s lifting her chin so instead of the top of her scalp we see underneath her chin. In a rounded final drawing it might be hard to see exactly where these planes are but our example cube in the top right helps illustrate where our face is pointing and where the other faces of the skull are in relation. This pose needs her to lift her chin up and turn her head, so I’ll structure her head to put her facial plane in a high-angled place and narrow it so I don’t fill the whole headspace with facial features. The first time I drew this particular example I tried to fit both eyes in the plane until I did my cube block-in and said, “oh okay there’s not as much space in this plane as I thought, I’ll put the nose here and use this space for her left eye and build the expression around that.” The blocking in really helps me restrict my space so I have enough room for my other features to fit in and help create the illusion of perspective I’m looking for.
Restricting your facial plane is a helpful way to make sure you hit the right angle, but there’s one angle where this is particularly important and that’s the dreaded ¾-reverse perspective, or the camera-behind-the-head-but-slightly-to-the-side view (D I). This angle is notoriously tricky to hit because it’s basically the exact opposite of what we expect from our head drawings, which if we still have our bad habits is a cheek line, some facial feature symbols and an ear. What I’ll do when I need to hit this angle is draw a little line at the back of the head like I would in the front, just to orient myself to where the center of the back of the head is. The ear from the back is a different shape from the ear from the side- we see the blade edge of the cartilage and the rounded part of the conch connecting it to the head so we need to basically draw our ears differently, we can’t shortcut them with little C-shapes. The trickiest part is the face. Our faces don’t have hard solid angles, they’re rounded, so even though our Perspective Cube doesn’t show a front facial plane we still have to represent the face at the side, since parts of it inform the shape of the side of the head as much as they inform the shape of the front. In my mockup I’ve given myself a tiny sliver of space for my face, so when I draw in my actual features (C II) I’ll indicate the corner of the eye, the curve of the cheekbone (as seen in A I) back to the corner of the mouth and a little bit of mouth in-between. The tight spacing of my facial blockin makes sure I have enough room for Monday’s sideburn between his face and his ear, and after I block in my hairline and the curve of his hairline at the nape of his neck I can give him his glasses, a cigarette for flavor and I’ve for a ¾-reverse face shot. He’s looking slightly down in this angle, as indicated by my cube, so I’ll give him the underside of his jaw as well, that and the straight line of his glasses arms reinforces the idea that he’s looking down and not just straight ahead. A less-extreme example is a quick look over the shoulder- I’ve used this shot a couple times in my comic and it can be very expressive angle. Lou has a sort of unique Barney Rubble no-neck head so I’ll approach him differently. I’ll start with my brain egg and add the mask (D III) but I’ll also add sort of a larger circle and then block in the flesh of his neck rather than use a straight line. He’s sort of doughy and soft so it gives him a sense of twisting and compressing. In this angle there is no top or bottom plane of the perspective cube, it’s a side-shot so I’ll block in an eye and a mouth and go from there. Lou has beady dot eyes (D IV) and I want him looking back over his shoulder so I’ll use his eyebrow for reference that he’s in fact looking our way instead of simply having deeply-recessed directionally-agnostic eyes. I use the curve of the brim of his hat and the lines of his coat collar to give a sense of backness and even though I gave his face more plane-room than Monday’s example it still feels like it’s from the back. A little bit of shading helps seal the deal.
It’s easy to fall into the trap of using three very specific head perspectives for all your head-work, it’s a pitfall I myself have fallen into and climbed out of. You can get so much more expression and variety out of your heads if you mix up the angles they’re drawn at, and it’s easier than it seems it you lay your foundation before building your house; if you bake your cake before you put on the ice cream. Your head’s an egg, your face is a mask on the front of that egg and you can position this any which way you want, and as long as you put your facial features in the areas you blocked out for yourself you’ll be able to draw a head from any perspective in the world!