Back when I started making comics I actually stuck to a rigid twice-a-week schedule. Every thirty or so pages I’ll try to find a story beat to close out a chapter on, and for three updates I’d run Intermission strips. These strips served a couple purposes: firstly, they let me take three pages and explore some of the peripheral characters of the setting, which helped flesh out the world I was working in. Second, they let me practice working in a different method- since they were all strictly black & white I got plenty of practice modeling light and shadow without all of my grey tones and built a better understanding of light and shadow, and the facets of the characters I’m modeling. And thirdly- and this was the important reason- because I was only working in straight blacks with no shading, these were incredibly quick to do and it offered me a week and a half to catch my breath from drawing 40-hour comic pages twice a week.
My schedule is currently broken so I don’t really “need” the breathers anymore (as much as I would love to update that frequently again), but I still draw the intermissions for the inking practice and to expand on some of the other facets of the story. Over the years and across the intermissions, however, I’ve found a couple different ways to go about putting them together, and each little run of three is always unique, so this week I’m going to lay out my thoughts on how I weave little stories in around a larger story to create a cohesive, larger whole!
During the early pages the intermissions had a simple narrative purpose. They gave a little backstory to threads like Mr. Cuddles and his quest to find Lizzie and served as soft introductions to a lot of Monday’s backstory, since I ended up writing that part on the fly. Early intermissions also gave me a chance to spitball some ideas as one-off moments which either stayed put in the intermission sections or, occasionally, they’d branch out into the actual comic itself, like the men in the yellow ponchos. Sometimes a story can just stay there exclusively and come back from intermission to intermission, in a long-stitched thread- this is currently the case with Yuri the boxer, who has made a number of appearances and has his own little arc, but it exists entirely outside the greyscale tones of the I always thought it was fun to carry these little side stories along in the peripheral, while building it up around the main narrative- it always gives me the future chance to pull it into the main story, but if I don’t then I never really have to, it works fine where it is.
After a few intermissions and a bit of side-story continuity developed I had the idea to make one three-page intermission into its own three-page stretch of the same one scene. Instead of writing one-shot vignettes I wanted to expand on aspects of the central story I couldn’t find time to fit into the primary narrative flow, so I condensed them down into three pages and put them between chapters. The three major arcs I’ve done this for are a look at Trevor, Lizzie’s seldom-seen fiance, a background story about Monday’s family and as a way to help establish Pat, Mayor Richardson and the Tombstone arc as a solid continuity. These weren’t looking at side threads of the comic, but rather took threads direct from the central comic and expanded on them in between chapters. It ended up being very helpful to have these little side-stories tucked away around the main narrative, otherwise I’d have to do some weird writing gymnastics to fit them into the story.
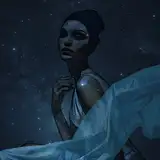
The narrative flexibility is largely a bonus next to the primary benefit of running black-tone intermission strips, which was the speed at which I could get them done. Normally my comic-making process involved a whole lot of pencils, then inks, then flats and painted tones and over the years that adds up to more and more time invested in each strip. When I run an intermission, for three updates I can forego a lot of that and just work in either pencils and inks or, as I grow bolder, straight inks onto the page. That saves me an incredible amount of time where I can either catch my breath or, back in the earlier days where I spent every waking hour making comics, do literally any form of leisure activity to enjoy myself. Exploring straight black-and-white inkwork is a lot of fun, actually, and as mentioned above it helped me develop a more robust understanding of light, shadow, shape, contour and contrast which itself feeds back into my normal greyscale painting. From one intermission to the next I experimented with a couple different ways of drawing in black inks (and by experimented I mean “whatever I felt like at the time”) and I’ve found there’s actually two distinct schools of ink technique that sprang up from my work, the soft hashline style and the harsh black shape style.
All of my ink comics tend to start out as lineart, and then I’ll make another Photoshop layer and add the tones to it. I have a fixation on value changes so I explored ways of simulating tones with just solid black ink, which meant drawing a while bunch of tiny little hashmarks. By controlling the distance between the lines I could make them appear darker or lighter and give my pictures a certain gentleness to the light and the setting. I’ve come up with a couple of rules for how to make a hashline technique look nice, which are as follows:
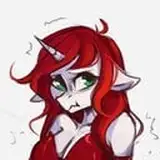
-- Keep your lines in a consistent direction. In individual patches of hash tone, make sure the lines are pointing in the same direction, or if they’re across a section of the same element, like Lizzie’s shirt sleeve in the above example, keep all of your lines within the shape in a uniform direction. I like to think of this as illustrating the turning of the fabric, or the direction of the weave. It makes it look clean and uniform.
-- No more than two lines should intersect in a field of tone. Hashlines go in one direction to define the shape, and if I want to add a second layer of tone inside that shape (like Lizzie’s workshirt sleeve) I’ll add a second layer of hashlines going in a perpendicular direction. Outside of that, though I won’t add any more directions or layers, otherwise the hash lines will look like a horrid directionless mess. There are areas where the tone will blend into black, but I’ll try to keep as much of those tighter hashlines in the two directions I established as I can. Keep the hashes clean!
-- Let your lights breathe. As a tone-happy artist I’ll get the urge to cover everything in hash lines to keep it “consistent”, and just make the lighter parts a lighter density of hash. It’s actually a much, much cleaner product if you allow your white paper to stay clean and just leave it alone! Just let your highlights stay white and add the gentle lines in your midtones. Focus more on modeling shape than on capturing color and your piece will not only look better, but come out quicker!
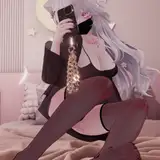
A couple weeks I was really pressed for time, even when I was making quicker pages (this was also a time when I worked a night job on top of making comics) and I didn’t feel like doing all those little hash lines, so I would experiment with the Solid Black Shapes method. This method foregoes all notions of gradient and midtone and strictly works in white or black, which as you can imagine saves a -lot- of production time. The harsh contrasts actually worked really well for weighty dramatic scenes and action shots. As with the hash technique, I came up with a couple rules to make the sharp black shapes look good
-- Define your light source. If things are going to look good you’re going to need a consistent direction of light to work from so you can tell what is white and what’s black. Without a clear direction it can get really confusing where to put black and where not to, which leads to my next rule:
-- Err on the side of light. This one has a couple exceptions but in general if you’re not sure if a shape is supposed to be black or white, let it stay white. It reads easier to the eye when something isn’t cast in shadow, so when in doubt don’t black it out!
-- Don’t be afraid to cover it in black. When I’m working in this manner I’ll have a lot of cases of me leaving a white trim or line around certain details because I absolutely have to preserve that particular line, shape or edge and the added white just makes everything look murky. Don’t be afraid to black over a lot of details and just cast it all in shadow- I had an issue like this drawing Monday’s ear detail and his stage-right jacket lapel where I kept thinking, I gotta keep the white parts to denote the shape when I realized, no I don’t! The visual cues that are already there will hint at what isn’t drawn, so if I just fill it in with black it’ll look just fine.
I’ve been thinking about intermissions lately since I’m about due for one, though with my recent prolonged update cycle that won’t be for a couple months, probably (sorry!). I’ve learned a lot by drawing a secondary set of comics in between my comics, so I thought I’d share some of the insight into narrative offshoots and different styles of visual representation.
Thanks for reading!