Hi fellow Wizards and Necromancers!
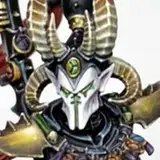
In this tutorial I will teach you how to paint amazing, deep blue color capes. The miniature we will use for this tutorial will be the Genestealer Cult Primus. I've uploaded the PDF version of this tutorial here as well as the classic version below, so everyone should be pleased, hopefully! Let’s get into it. Let’s get into it!
1. Over a basecoat of black, add a chunky/thick edge highlight over all of the edges using Kantor Blue, layer consistency. Make the edge highlight wide enough so that you can fit the following highlights inside of it.

2. Continue building on the highlights with the same width and same consistency, but extend the lines, connecting the edge highlights. The changes are easily noticeable when you quickly switch between Step 1. and Step. 2

3. Follow all of the lines with layer consistency Celedor Sky. Make sure that this highlight is thinner in width than the last one, so that there is a smooth transition between the colours.

4. Next up, use layer consistency Celedor Sky to add tiny scratches all over the surface, focusing on the areas around the previous highlights. We are creating a effect of weathering here, to show that the material is worn. Use the tip of your brush to add the scratches.

5. Next, add a single coat of glaze consistency Celedor Sky over the entirety of the area, to blend all of the highlights together. As a reminder, glaze consistency = very watered down paint, in the following ratio: paint 1:3 water.

6. Add more glazing towards the top and bottom part of the area you are painting. We are building on the soft highlights here to create more contrast and a even more pleasing visual effect. Follow the arrows if you have trouble with understanding where to place the additional highlights.

7. Add more glazing in the same areas as in the previous step but with a 1:3 mix of Fenrisian Grey and Celedor Sky.

8. Add a coat of a 1:3 mix of Fenrisian Grey and Celedor Sky, layer consistency, on top and bottom edges. Follow the lines if you have trouble with understanding where to place the highlights.

9. Use glaze consistency Fenrisian Grey to build a few brighter spots on the areas that would be getting the strongest light. We have been focusing on the top and bottom parts of the material so far, and we will continue to do so here.

10. Add a coat of layer consistency Ivory (from AK Interactive) on the areas that should be the brightest. So that’s in spot highlights and on the bottom parts of the holes in the material. You should add this very sparingly, so that there is a smooth transition between all of the colour mixes we have produced before.

11. The final step will be simple – we will add a glaze of Ivory to the top part of the material to create a even stronger contrast.

Here are some shots of the finished product:


Here is a collage of all of the steps for convenience:


This tutorial should be very useful for anyone who wants to achieve a very beautiful, strong, deep blue on their miniatures.
This tutorial is the first one on this miniature and hopefully you will see a few more in the future, as I really like this one and think it has loads of potential!
Thank you very much for supporting me – it means the world to me! I dream of being able to paint and make tutorials full time, so if you like my Patreon – please tell your friends about it. It would make a massive difference to me and hopefully it will be very beneficial for your friends :)
Best wishes,
Mamikon