Surprise! I have another tutorial! This tutorial will go over a translated version of the method Lesdias uses for his post-processed skin, as Photoshop doesn't have Channel Blur. This should also be replicable in other programs like GIMP. This tutorial will also be free because I actually tweeted about this method when I was working on the Underground Pack, and this serves as a longer explanation of how I made it work. And also because it's still Christmas, y'know?
First, lets go over what we're trying to do here: SSS is short for SubSurface Scattering and refers to how light penetrates semi-transparent objects. Even if you're vaguely aware of this concept you probably know of its most famous example. Try this out now; turn on your phone flashlight and put it behind your hand. You'll notice the edges of your fingers become extremely bright. SSS in 2D and 3D art tries to replicate that in a more subtle fashion, but SFM isn't a modern renderer and thus lacks this option. If you want something close to it pretty quickly, there are ways to make it possible.

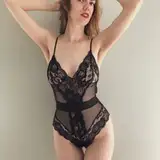
(View the image in a new tab! its a pretty subtle effect cropped, but unfortunately Patreon won't let me show any NSFW areas where the effect is more pronounced, so the best points of comparison are her lips, nose, and neck.)
Just a quick warning before we start; if you need to make any destructive edits to the main image, make sure that creating the SSS is the very last thing you do when editing. I cannot stress this enough. If you need to do any destructive edits to the main image than you cannot reliably replicate over on the SSS, it will look terrible.

(An extreme example here caused by smudging the neck and drawing a frowny face in white.)

(clean render- open this up in a new tab too and compare it to the blur types we use later on!)
So lets begin with this clean render. We have finalized all our edits for it. Now all we need to do is just duplicate it and disable the layers blue and green channels on the duplicate layer.


All that's left now is to blur the SSS layer! The results will vary depending on your lighting setup, models used, and what type of blur you apply. For the best results, make sure your subject has fleshy skin tones and is well lit As for the blurring you can use, I'll go over box, gaussian and surface blur here. Make sure your editor has a preview option for your filters as that can save you a lot of time on refining the effect.


They're so close I had to label them!
The advantages to box blur and gaussian blur are that they're a standard in most image editors, meaning this can be done by just about anyone. The downside is that we're starting to introduce a lot of blue shifting even at low values. You might have also noticed a halo around the edges of her tentacles, the background is slightly blurrier than it already was, and the introduction of a blue border around the image.
If you have to use this method, make sure you can take the time to clean this up. Maybe you could even appropriate it into an 80's VHS effect, but if you have GIMP or Photoshop, theres one more technique we can use...

For me, surface blur is the clear winner here. Advantages to this are that it keeps within the confines of your subjects, thus heavily reducing blue shifts and having no border issue like we had earlier. The downsides are that you need to tweak with the sliders a bit to get visible results, and that its only available in Photoshop and GIMP (it's "selective gaussian blur" in the latter). If you want a subtle effect, this is the way to go.
Once you have a blur you're happy with, you can reduce the opacity to adjust its intensity, or add a layer mask to erase parts out that shouldn't be tinted. If you created and processed a depth file (SHAMELESS PLUG), you could also use that as a mask to clean up the background much quicker!
Hope this helps!