I'm not the best at giving titles for my drawings/seldom animated stuff, how do others do it?
Anyhow, here's a more elaborate behind-the-scenes look at this .png:
This is a very good place to thumbnail how you want the overall piece to look (or feel). Although, you could also wing this step - which can be pretty reckless.
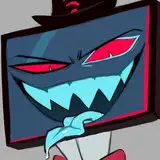
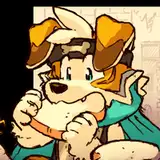
I started with an eye and expanded to the rest of the fire dog's face. That's what an illustration tutor taught me to do at one point ¯\_(ツ)_/¯


Hey, it's starting to look like something! That's also some FF1 Fighter mane bias going on!

Once the face is kinda ironed out, the focus shifted to the hands. I'd say that's the second major point of interest, the face/stare being the first. This is also where a bunch of googling was used for references. Heck, if you can, use your own hands for inspiration too!

First pass completed! Now for a bunch of edits. This usually involves the free transform tool and replicating the poses I put my characters in and seeing if it feels natural enough. No, I'm not that ripped sadly ᕦ(ò_óˇ)ᕤ

A lot of rotating and redrawing of the lower torso later, I end up with:

Once the character's overall pose is in place, other background elements get introduced into the scene. In this instance, I chose a public transport for this fire dog to sit in. Again, more googling was done to get the feel of the environment.
Honestly, establishing a scene should've been the first step (refer to the dot point at the start) because it can potentially save a lot of time and prevent headaches.
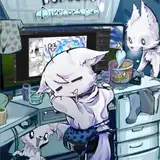
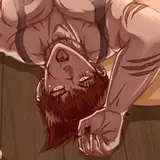
Finally, after the background has been coloured, Samson gets shaded based on his surroundings, and eventually, you get <see the first image>!

And there you have it! I hope this was slightly insightful and not as confusing to follow through. Thank you for sticking around 🙇♂️
Zaccoon
2025-03-30 19:20:34 +0000 UTCTarouMyaki
2025-03-30 18:15:55 +0000 UTC